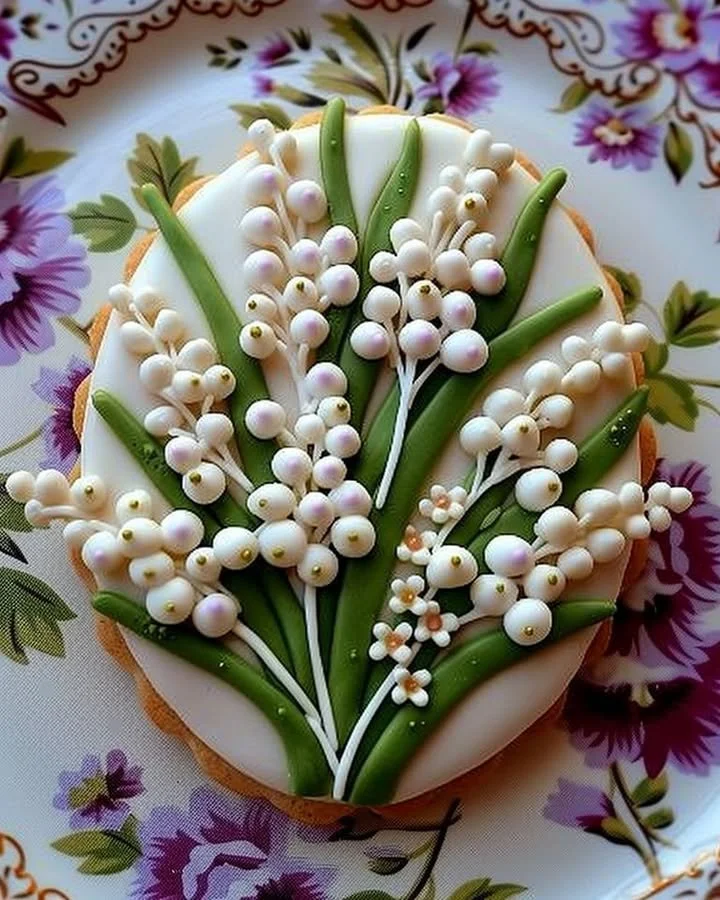
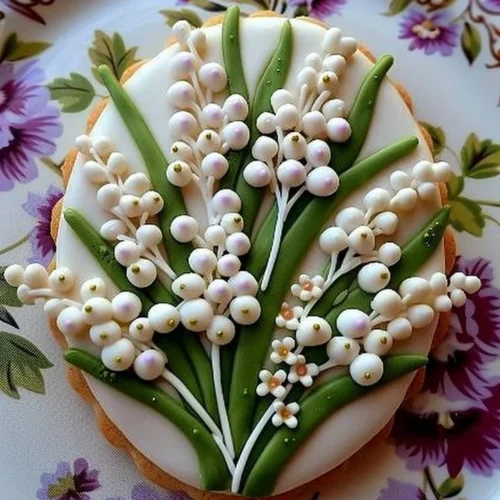
Lily of the Valley Decorated Sugar Cookies
The Lily of the Valley Decorated Sugar Cookies are a delightful treat that beckons with their sweet aromas and exquisite designs. This recipe invites you into a world of whimsy and joy, where the soft, tender bites of buttery sugar cookies are adorned with vibrant, eye-catching royal icing. Each piece is not just a cookie; it’s a canvas of creativity and love. Perfectly shaped like the delicate flowers they represent, these cookies evoke nostalgia, celebrating springtime blossoms and the childhood delight of holiday baking. With a step-by-step approach, you’ll find yourself lost in the comforting sound of mixing, rolling, and decorating, creating not only a treat but a cherished moment in the kitchen.
History / Fun Fact
Sugar cookies have a rich history that dates back to the mid-1700s in the United States, particularly among the Pennsylvania Dutch. The craft of sugar cookie making has evolved over the centuries, becoming an enduring symbol of celebration and hospitality. The inspiration for Lily of the Valley cookies, however, lies in the flower’s enchanting beauty and sweet fragrance. Often associated with purity and sweetness, Lily of the Valley is a beloved flower in gardens and floral arrangements. By transforming them into edible art, these cookies not only celebrate the delicate flower but also bring joy and sweetness to special occasions.
Ingredients
To create these delightful treats, you will need the following ingredients, each chosen for their sensory appeal:
- 2 3/4 cups all-purpose flour – the base for fluffy texture.
- 1 teaspoon baking soda and 1/2 teaspoon baking powder – to give those cookies the perfect rise.
- 1 cup unsalted butter, softened to a creamy perfection.
- 1 1/2 cups sugar – for a rich sweetness that melts in your mouth.
- 1 egg – binding all the elements together with its velvety richness.
- 1 teaspoon vanilla extract – infusing the dough with warmth and nostalgia.
- 1 teaspoon almond extract – adding a hint of nutty aroma.
- 1/2 teaspoon salt – balancing the sweetness.
- 2-3 tablespoons milk – to achieve the ideal consistency.
- White and green royal icing – for decoration, offering a canvas for your creativity.
Every ingredient plays a vital role, harmonizing to create a cookie that is not only delicious but also an intricate work of art suitable for any special occasion.
Cooking Time & Tips For Lily of the Valley Decorated Sugar Cookies
Preparing the Lily of the Valley cookies can be a quick venture or a leisurely, detailed process depending on your preference. Quick preparation offers efficiency — you can whip these cookies up in about an hour, while allowing ample time for cooling and decorating can stretch the joy of cookie making into a delightful afternoon activity.
To ensure your cookies turn out perfectly, use fresh ingredients, as they make the biggest difference in flavor and texture. Ensure your butter is truly softened before creaming; if it’s too cold, you won’t achieve that fluffy texture. Don’t skip the chilling of the dough; a brief fridge break helps maintain shape while baking.
Step-by-Step Directions
Start by preheating your oven to 350°F (175°C), the warmth of the oven echoing the anticipation in the room. Line your baking sheets with parchment paper, creating a soft landing pad for your cookies.
In a medium bowl, whisk together the all-purpose flour, baking soda, baking powder, and salt. The scent of the flour will fill your kitchen as the dry ingredients unite.
In a large bowl, take your softened butter and cream it together with the sugar until the mixture is light and fluffy, reminiscent of clouds. The buttery goodness should coat the back of a spoon like a warm embrace.
Add the egg, followed by the vanilla and almond extracts. Beat the mixture until smooth, enjoying the delightful aroma that wafts through the air.
Now, gently add the dry ingredients to the wet mixture. Mix until combined, and if your dough feels too stiff, begin adding milk one tablespoon at a time until the texture is just right.
On a floured surface, roll out your dough to about 1/4 inch thick. Use cookie cutters to shape your cookies into desired forms, such as elegant ovals or delightful circles.
Place the cookies on the prepared baking sheets and watch them come to life as they bake for 8-10 minutes or until the edges are lightly golden — a perfect indicator of readiness.
Once baked, let the cookies cool on a wire rack. The anticipation builds as you prepare to take your creativity to the next level.
Once cooled, it’s time to bring your vision to life with the royal icing. Using white for the lilies and green for the leaves, let your artistic flair shine as you decorate each cookie. Allow the icing to set before serving or gifting — these cookies deserve to look as good as they taste.
Serving Suggestions & Occasions
These enchanting cookies make a fabulous centerpiece for any gathering, especially springtime celebrations, baby showers, or garden parties. Pair them with a refreshing cup of herbal tea or a glass of lemonade, allowing the floral design to enhance your table settings. They make wonderful gifts, beautifully wrapped in cellophane with a floral ribbon or placed in an elegant cookie jar.
Common Mistakes For Lily of the Valley Decorated Sugar Cookies
One of the most common mistakes while making these cookies is not chilling the dough. Skipping this step can result in cookies spreading too much while baking, losing the lovely shapes you’ve crafted.
Another common mishap is overbaking, which can lead to dry cookies. Keep a watchful eye on them, as the baking time can vary slightly with oven differences. Lastly, when decorating with royal icing, ensure it is the right consistency; too runny, and it won’t hold shape, too thick, and it will be challenging to work with.
Healthier Alternatives & Variations
For those looking for healthier options, consider substituting part of the all-purpose flour with whole wheat flour for added fiber. You can also use natural sweeteners like honey or coconut sugar in place of refined sugar for a touch of wholesome sweetness.
If you’re vegan or have allergies, opt for egg replacements such as flaxseed meal or applesauce, and swap the butter with coconut oil or a plant-based butter alternative. You can also explore flavor variations by adding zest from lemons or oranges, enriching the cookie with a citrus twist.
FAQs
Can I freeze the cookie dough?
Absolutely! Roll the dough into logs, wrap it in plastic wrap, and freeze. When ready, slice and bake directly from the freezer.How do I fix my royal icing if it’s too runny?
Simply add a little powdered sugar until you reach the desired consistency for piping and flooding.How long do decorated cookies keep?
Stored in an airtight container, your decorated cookies should last for up to a week.Can I use different cookie shapes?
Yes! Feel free to get creative with various shapes and sizes to match the occasion.Do I need to refrigerate the cookies after decorating?
It’s best to let the icing set at room temperature before storing them. Once set, they can be stored in a cool place, away from sunlight.What’s the best way to transport decorated cookies?
Use a flat, padded container to ensure they stay intact while moving. Adding parchment paper between layers can help prevent sticking.
Conclusion
With each cookie, you create not just a dessert but a sweet experience, filled with laughter, stories, and cherished moments. So why wait? Find your apron, gather your ingredients, and let the magic of the Lily of the Valley Decorated Sugar Cookies bring joy and creativity into your kitchen today. Whether for a celebration or an everyday treat, these cookies promise to enchant with their delicate beauty and delightful taste. Dive into the delightful process of making them and share your creations with those you love!
Lily of the Valley Decorated Sugar Cookies
Ingredients
Cookie Dough
- 2 3/4 cups all-purpose flour The base for fluffy texture.
- 1 teaspoon baking soda For rise.
- 1/2 teaspoon baking powder For rise.
- 1 cup unsalted butter, softened Should be softened to a creamy perfection.
- 1 1/2 cups sugar For sweetness that melts in your mouth.
- 1 egg Binds all elements together.
- 1 teaspoon vanilla extract Infuses warmth and nostalgia.
- 1 teaspoon almond extract Adds a hint of nutty aroma.
- 1/2 teaspoon salt Balances the sweetness.
- 2-3 tablespoons milk To achieve the ideal consistency.
Decorating Icing
- White and green royal icing For decoration.
Instructions
Baking
- Preheat your oven to 350°F (175°C). Line your baking sheets with parchment paper.
- In a medium bowl, whisk together flour, baking soda, baking powder, and salt.
- In a large bowl, cream together the softened butter and sugar until light and fluffy.
- Add the egg, vanilla, and almond extracts into the mixture and beat until smooth.
- Gently add the dry ingredients into the wet mixture, mixing until combined. Add milk one tablespoon at a time until desired dough consistency is reached.
- On a floured surface, roll out the dough to about 1/4 inch thick and cut shapes with cookie cutters.
- Place cookies on prepared baking sheets and bake for 8-10 minutes or until edges are lightly golden.
- Let the cookies cool on a wire rack before decorating.
Decorating
- Use white icing for the lilies and green for the leaves to decorate each cookie.
- Allow the icing to set before serving or gifting.