No Knead Artisan Bread
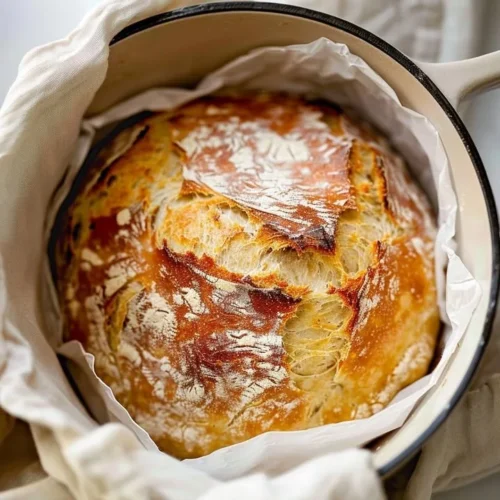
No Knead Artisan Bread is a game-changer in the world of homemade baking. Imagine pulling a warm loaf from your oven, its crust crackling and golden, inviting you to break into it. This bread embodies the essence of comfort, with an aroma that fills your kitchen and wraps you in its warmth. With its rustic texture and scrumptious flavor, No Knead Artisan Bread is not just a recipe—it’s an experience worth diving into.
The beauty of this bread lies in its simplicity. It requires minimal effort and just a handful of ingredients, making it accessible for both novice and experienced bakers. Plus, there’s nothing quite like the satisfaction of creating your own bread at home. Whether you’re enjoying it with butter, dipping it in olive oil, or serving it alongside your favorite soups and stews, this bread is guaranteed to elevate any meal.
Why You’ll Love This Recipe
This No Knead Artisan Bread is perfect for those who want to savor the art of bread-making without the extensive time and effort typically associated with it. Here are some reasons why you’ll love this recipe:
- Easy Prep: The dough comes together in just a matter of minutes. No special skills or extensive experience are required.
- Family-Friendly: This is a great recipe to get the kids involved in the kitchen. They’ll love watching the dough come to life!
- Minimal Ingredients: With just five basic ingredients, you can whip up a delicious loaf without the need for any complicated shopping lists.
- Time Saving: Although it requires a long rise time, the actual hands-on time is just a fraction of the total, allowing you to go about your day as the dough does its thing.
Ingredients for No Knead Artisan Bread
- 3 cups bread flour (15.8 oz. or 450g): This flour gives the bread its sturdy structure and helps develop a beautiful crust.
- 1 tablespoon white granulated sugar: A touch of sugar adds a hint of sweetness and aids in yeast activation.
- 2 teaspoons dried instant or rapid rise yeast: This is the magic ingredient that makes your bread rise beautifully and gives it that light texture.
- 1 1/2 teaspoons salt: Salt not only enhances flavor but also controls yeast activity, ensuring a perfect loaf.
- 1 1/2 cups warm water (375 ml): Warm water encourages yeast activity, making it a crucial component of the dough.
- 1 tablespoon olive oil: This rich oil adds flavor and a slight tenderness to the final loaf.
Step-by-Step Directions
Embarking on the journey of making No Knead Artisan Bread is simple and rewarding! Here’s how you can do it:
- Mix the Dry Ingredients: In a large mixing bowl, combine the bread flour, sugar, yeast, and salt. Stir them together to ensure an even distribution.
- Add Water and Oil: Pour in the warm water and olive oil, mixing it all together until all the ingredients are combined. The dough will be wet, sticky, and shaggy, which is exactly what you want!
- Allow the Dough to Rise: Lightly spray the top of the dough with cooking oil spray to prevent drying. Cover the bowl tightly with plastic wrap and place a dry tea towel over it. Let it rest in a warm, draft-free environment for 2-3 hours or until the dough has doubled in size.
- Prepare for Baking: Once the dough has risen, place a large Dutch oven (with its lid) in the oven and preheat to 450°F (230°C) for 30 minutes. This heat is key to achieving that crispy crust.
- Shape the Dough: Lightly flour your work surface and a plastic spatula. Scrape the dough onto the floured surface, sprinkle a bit more flour on top, and fold it over itself several times to form a round shape.
- Rest Again: Transfer the dough onto a piece of parchment paper, reshaping it if necessary. Allow it to rest while the oven continues to preheat.
- Bake the Bread: Carefully remove the hot Dutch oven from the oven. Lift the parchment paper with the dough and place it inside the hot pot. Cover with the lid and bake for 30 minutes. Remove the lid and then bake for an additional 12-15 minutes, or until the bread is golden brown.
- Cool and Slice: Once baked, transfer the loaf to a wire rack and let it cool for about 10 minutes before slicing. This is the hardest part—waiting to dig in!
Tips & Tricks
- Hydration is Key: Don’t be tempted to add too much flour while shaping; a wet dough leads to a better crust and crumb.
- Longer Rise: For an even more developed flavor, consider letting the dough rise overnight in the fridge. Just take it out and let it come to room temperature before baking.
- Experiment with Flavors: Add herbs, garlic, or seeds to the dough for an extra layer of flavor.
- Use a Lid for Steaming: If you don’t have a Dutch oven, you can use any oven-safe heavy pot with a tight-fitting lid to trap steam, creating that beautiful crust.
Serving Suggestions & Pairings
This crusty No Knead Artisan Bread pairs beautifully with a variety of dishes. Serve it alongside a hearty bowl of soup, like tomato basil or chicken noodle, for a comfort meal. It’s also perfect for creating gourmet sandwiches, such as classic grilled cheese or an elegant avocado toast topped with fresh tomatoes and seasonings. Don’t forget to enjoy it on its own with a drizzle of quality olive oil or a spread of garlic butter.
Nutritional Information
Depending on the serving size, this No Knead Artisan Bread is relatively light on calories, with roughly 130-150 calories per slice. It is an excellent source of carbohydrates and can provide energy for your day. The bread is high in fiber and low in added sugars, making it a healthy option to accompany your meals.
Storing Tips & Variations for No Knead Artisan Bread
To keep your No Knead Artisan Bread fresh, store it in a paper bag at room temperature for up to three days. If you need to keep it longer, consider slicing it and freezing individual pieces. To reheat, simply pop them in a toaster or microwave for a few seconds. For a healthier twist, you can experiment with whole wheat flour or add in seeds or nuts for added nutrition and texture. Taking your bread-making skills further, you could also try incorporating herbs such as rosemary or thyme for a fragrant touch.
Conclusion for No Knead Artisan Bread
Don’t hesitate to give this No Knead Artisan Bread a try! It’s a delightful recipe that’s simple enough for anyone to master. The enjoyable aroma, the glorious texture, and the mouth-watering taste make it a must-try. So gather your ingredients and embark on this pleasurable baking adventure today!
FAQs
1. Can I use all-purpose flour instead of bread flour?
Yes! While bread flour is preferred for its higher protein content, all-purpose flour can also yield good results. The bread might not be quite as chewy or have the same structure, but it will still be delicious.
2. What if I don’t have a Dutch oven?
You can bake the bread on a baking stone or a baking sheet, but be sure to create steam in the oven by placing a shallow pan filled with water at the bottom while baking.
3. How long does this bread stay fresh?
It is best enjoyed fresh but can be stored for up to three days at room temperature in a paper bag. For longer storage, freezing is recommended.
4. Can I add flavors to the dough?
Absolutely! Experiment with any herbs, spices, or cheese to create unique flavors that suit your palate.
5. What can I serve with this bread?
This No Knead Artisan Bread is incredibly versatile. Serve it with soups, salads, stews, or use it to make delicious sandwiches for any meal of the day!
No Knead Artisan Bread
Ingredients
Main Ingredients
- 3 cups bread flour This flour gives the bread its sturdy structure and helps develop a beautiful crust.
- 1 tablespoon white granulated sugar A touch of sugar adds a hint of sweetness and aids in yeast activation.
- 2 teaspoons dried instant or rapid rise yeast This is the magic ingredient that makes your bread rise beautifully.
- 1.5 teaspoons salt Enhances flavor and controls yeast activity.
- 1.5 cups warm water Warm water encourages yeast activity.
- 1 tablespoon olive oil Adds flavor and tenderness to the final loaf.
Instructions
Preparation
- In a large mixing bowl, combine the bread flour, sugar, yeast, and salt. Stir them together to ensure even distribution.
- Pour in the warm water and olive oil, mixing until all ingredients are combined. The dough will be wet, sticky, and shaggy.
- Lightly spray the top of the dough with cooking oil spray to prevent drying. Cover the bowl tightly with plastic wrap and place a dry tea towel over it. Let it rest in a warm, draft-free environment for 2-3 hours or until the dough has doubled in size.
Baking
- Once the dough has risen, place a large Dutch oven (with its lid) in the oven and preheat to 450°F (230°C) for 30 minutes.
- Lightly flour your work surface and a plastic spatula. Scrape the dough onto the floured surface, sprinkle a bit more flour on top, and fold it over itself several times to form a round shape.
- Transfer the dough onto a piece of parchment paper, reshaping if necessary. Allow it to rest while the oven continues to preheat.
- Carefully remove the hot Dutch oven from the oven. Lift the parchment paper with the dough and place it inside the hot pot. Cover with the lid and bake for 30 minutes.
- Remove the lid and then bake for an additional 12-15 minutes, or until the bread is golden brown.
- Once baked, transfer the loaf to a wire rack and let it cool for about 10 minutes before slicing.