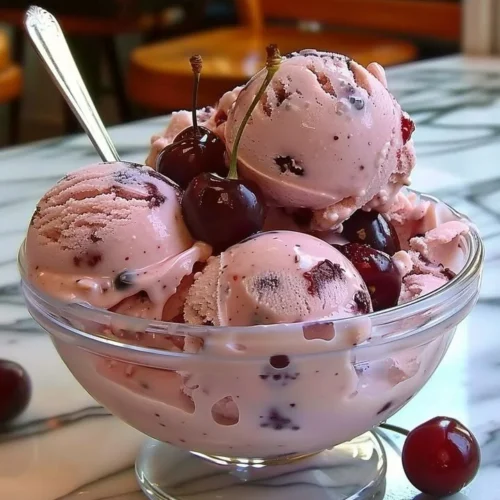
Homemade Cherry Ice Cream
There’s something enchanting about the churn of an ice cream maker, the sweet scent of cherries filling the air. Homemade Cherry Ice Cream is a recipe that wraps you in a blanket of nostalgia, thanks to its creamy, dreamy texture and the vibrant burst of juicy cherry goodness. As you embark on this step-by-step culinary adventure, your kitchen transforms into a sanctuary of flavors and aromas, evoking summer memories and sunlit picnics. With each scoop of this luscious ice cream, you’ll experience the perfect balance of sweet, tart, and refreshing. Whether you’re celebrating a special occasion or simply indulging in a treat after dinner, this delightful frozen dessert is one you’ll want to make time and time again.
History / Fun Fact
The origin of ice cream can be traced back to ancient China, where a mixture of rice and milk was frozen in the snow. However, it was in the 18th century that ice cream began to take on the form we recognize today, with the introduction of cream and sugar. Cherries, beloved for their vibrant color and sweet-tart flavor, have graced desserts for centuries, often featured in pies and tarts during the warm summer months. In American cuisine, cherry ice cream began appearing in the early 1900s and quickly became a favorite summertime treat. The fusion of cherry and creamy goodness represents not just a recipe, but a celebration of nature’s bounty and indulgence.
Ingredients
The allure of homemade cherry ice cream begins with a handful of carefully chosen ingredients. You’ll need 2 cups of heavy cream, rich and silky, ensuring that every bite melts smoothly on your tongue. Add 1 cup of whole milk, which imbues the ice cream with a comforting creaminess. 3/4 cup of granulated sugar sweetens the mixture, creating a luscious treat that balances the tartness of the cherries. A dash of 1 teaspoon vanilla extract brings warmth and depth, while the star ingredient, 2 cups of fresh, pitted, and chopped cherries, delivers bursts of juicy flavor. A splash of 1 tablespoon lemon juice brightens the fruit, and if desired, a hint of almond extract adds a unique twist. Finally, 1 tablespoon cornstarch can be used for those who love an extra creamy texture.
Cooking Time & Tips For Homemade Cherry Ice Cream
When it comes to cooking time, you have options. A quick preparation can yield delightful results, but for those willing to invest a little more time, slow preparation enhances the flavors and textures. The overall process will take around 30-40 minutes to prepare, plus several hours for freezing. For success, be sure to chill your ice cream maker ahead of time, and don’t rush the mixing process—patience is key! Using fresh, ripe cherries will elevate your ice cream’s flavor, making the effort worthwhile.
Step-by-Step Directions
Start your journey by combining 2 cups of heavy cream, 1 cup of whole milk, and 3/4 cup of granulated sugar in a medium saucepan. Heat this delightful mixture over medium heat, stirring occasionally until the sugar dissolves and the aroma fills your kitchen. In a separate small bowl, mix 1 tablespoon of cornstarch with 2 tablespoons of milk to create a slurry. This adds an irresistible smoothness to your ice cream. Gradually introduce this slurry into your warm cream mixture, stirring constantly, until it thickens just slightly—this should take about 5-7 minutes.
Once thickened, remove the saucepan from the heat and stir in 1 teaspoon of vanilla extract, alongside 1/2 teaspoon of almond extract if you’re feeling adventurous. Allow this creamy concoction to cool to room temperature. Meanwhile, prepare your cherries; toss 2 cups of chopped cherries with 1 tablespoon of lemon juice to preserve their vivid color and enhance their natural sweetness.
Once the cream mixture has cooled, pour it into your ice cream maker and churn according to your manufacturer’s instructions. As the ice cream thickens and swirls, you can already imagine the flavors dancing on your palate. Gently fold in the prepared cherries, distributing them throughout the creamy base.
Transfer the mixture to an airtight container, and freeze for at least 4 hours—or until it is beautifully firm. Each time you open the container to serve, the aroma of cherries will lift to greet you, inviting you to indulge in your creation. The moment you scoop your homemade cherry ice cream into a bowl, the world around you fades away as you savor every delightful bite.
Serving Suggestions & Occasions
Homemade cherry ice cream is a versatile delight. Serve it alongside a slice of warm chocolate cake for a decadent dessert or offer it in crisp waffle cones at summer parties. It’s perfect for outdoor barbecues, birthday celebrations, or simply enjoyed on a quiet evening at home. Pair this decadent treat with fresh mint leaves for a pop of color and freshness, or drizzle a rich chocolate sauce over the top for an added layer of indulgence. No matter the occasion, this cherry ice cream will steal the spotlight!
Common Mistakes For Homemade Cherry Ice Cream
While making this sweet treat, avoid some common pitfalls. One mistake is skimping on the churning time; proper churning is essential to create a smooth texture. Another common error involves using under-ripe cherries, which can leave you with a bland ice cream. Be sure to taste your fruit first. Lastly, resist the temptation to rush the freezing process; letting it freeze thoroughly ensures the best texture and flavor.
Healthier Alternatives & Variations
If you’re looking to create a healthier version of this cherry ice cream, consider substituting some of the heavy cream with Greek yogurt for a tangy twist. You can also use a natural sweetener like honey or maple syrup instead of sugar, which adds a unique flavor profile. For those avoiding dairy, almond or coconut milk can serve as excellent substitutes, although they may yield a slightly different texture. Feel free to experiment by adding other fruits, like blueberries or peaches, for a mixed berry sensation!
FAQs
Can I make this ice cream without an ice cream maker?
Yes, you can! After mixing, pour the mixture into a shallow dish and freeze it. Stir every 30 minutes until it reaches your desired consistency.How long can I store homemade cherry ice cream?
Homemade cherry ice cream can be stored in an airtight container for up to two weeks, although it’s best enjoyed fresh.What other fruits can I use in this recipe?
You can experiment with other fruits such as strawberries, peaches, or blueberries, either alone or in combination with cherries.Can I use frozen cherries instead of fresh?
Yes, you can use frozen cherries, though fresh cherries bring a more vibrant flavor and texture to the ice cream.Is there a non-dairy version of this ice cream?
Absolutely! Substitute heavy cream and milk with coconut milk or almond milk for a delicious dairy-free treat.How can I make the ice cream even creamier?
To enhance the creaminess, try adding a bit more heavy cream or omit the cornstarch for a softer texture.
Conclusion
Now that you have the full scoop on creating your very own homemade cherry ice cream, it’s time to whip up a batch in your kitchen. The process is not just about making ice cream; it’s an experience—the laughter, the blending of ingredients, and eventually, the joy of indulging in a creamy, cherry-filled delight. Embrace the flavors, and let the smiles abound as you enjoy every spoonful. Grab those fresh cherries, gather your ingredients, and get started today—you won’t regret it!
Homemade Cherry Ice Cream
Ingredients
Ice Cream Base
- 2 cups heavy cream Ensure it's rich and silky for smooth texture.
- 1 cup whole milk Provides comforting creaminess.
- 3/4 cup granulated sugar Sweetens the mixture, balancing the tartness of the cherries.
- 1 teaspoon vanilla extract Adds warmth and depth to flavor.
- 1 tablespoon cornstarch Optional for extra creaminess.
- 1 tablespoon lemon juice Brightens the cherry flavor.
- 1/2 teaspoon almond extract Optional for a unique twist.
Cherries
- 2 cups fresh pitted and chopped cherries The star ingredient, ensure they're ripe for the best flavor.
Instructions
Preparation of Base
- Combine heavy cream, whole milk, and granulated sugar in a medium saucepan.
- Heat over medium heat, stirring until sugar dissolves.
- In a small bowl, mix cornstarch with 2 tablespoons of milk to create a slurry.
- Gradually stir the slurry into the warm cream mixture, until it thickens slightly, about 5-7 minutes.
Cooling & Cherries
- Remove from heat and stir in vanilla extract and almond extract if using.
- Allow mixture to cool to room temperature.
- Toss chopped cherries with lemon juice in a separate bowl.
Churning
- Pour mixture into ice cream maker and churn according to manufacturer’s instructions.
- Gently fold in prepared cherries once ice cream thickens.
Freezing
- Transfer to an airtight container and freeze for at least 4 hours, or until firm.