Red Velvet Brownies
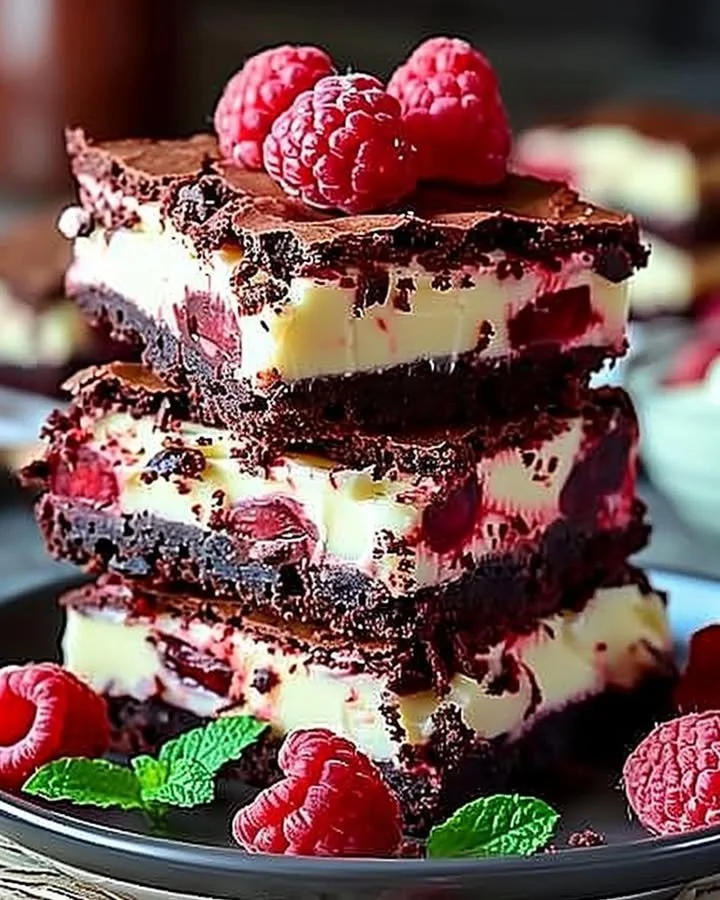
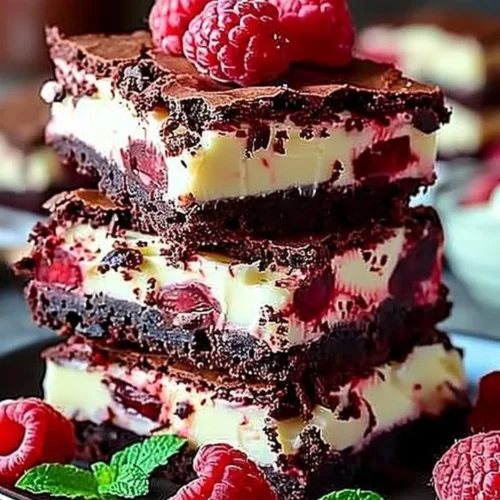
There’s something undeniably enchanting about Red Velvet Brownies. Imagine inhaling the rich, warm aroma of freshly baked chocolate wafting through your kitchen, making your heart race with anticipation. This recipe brings together the delightful textures of fudgy brownies with the iconic red velvet flavor, topped off with a luxurious cream cheese swirl that beckons to be tasted. As you follow this step-by-step guide, you’ll feel the excitement build with every layer created, leading you to a divine dessert experience that’s perfect for any occasion.
History / Fun Fact
The vibrant color of red velvet baked goods has a fascinating history that dates back to the early 20th century. While red velvet cake gained popularity in the Southern United States, it was during World War II that a boost of cocoa prices led bakers to use beet juice to add moisture and color to chocolate-based treats. This unexpected twist contributed to the unique red hue we associate with red velvet today. The combination of cocoa, vanilla, and buttermilk resulted in a tender, velvety texture that has since made its way into various forms, including our delicious Red Velvet Brownies.
Ingredients
To create these delightful Red Velvet Brownies, you will need the following rich and creamy ingredients that blend perfectly together:
- 1/2 cup unsalted butter, melted: A luscious base for our brownies, infusing them with rich flavor.
- 1 cup granulated sugar: This will sweeten the brownies to perfection, creating a delightful contrast to the cocoa.
- 2 large eggs: Essential for binding the ingredients, adding moisture, and providing structure.
- 1 tsp vanilla extract: The fragrant notes evoke warmth and sweetness in each bite.
- 1 tbsp red food coloring: This vibrant hue gives our brownies their signature look, making them visually irresistible.
- 1 cup all-purpose flour: The backbone of our brownies, giving them the perfect tender crumb.
- 1/4 cup unsweetened cocoa powder: Rich and bold, providing that familiar chocolate flavor without overpowering.
- 1/2 tsp baking powder: Essential for a little lift and fluffiness in texture.
- 1/4 tsp salt: A pinch to enhance all the sweet flavors.
- 8 oz cream cheese, softened: This is our secret weapon for a creamy, dreamy swirl.
- 1/4 cup granulated sugar: Sweetening the cream cheese mixture for a delightful contrast.
- 1 egg: Adds richness and stability to our creamy topping.
- 1/2 tsp vanilla extract: Enhancing the flavors of the cream cheese for ultimate deliciousness.
Cooking Time & Tips For Red Velvet Brownies
The beauty of Red Velvet Brownies is that they can be prepared in both a quick and slower-paced manner, depending on how much time you have. A quick preparation, taking about 45 minutes from start to finish, is perfect for an impromptu gathering. However, if you choose to slow down, taking time to savor the process of measuring, mixing, and swirling, you might find deeper satisfaction and connection in your baking experience.
Here are some practical tips for success: Ensure your ingredients are at room temperature before mixing for a smoother batter. Be careful not to overmix the brownie batter; a few flour streaks are perfectly okay. For the cream cheese swirl, don’t skip softening the cream cheese beforehand—this will help achieve that silky texture without lumps.
Step-by-Step Directions
Preheat your oven to 350°F (175°C), filling your kitchen with the promise of baked goodness to come. Grease and line an 8×8-inch baking pan with parchment paper, which will ensure a clean release after baking.
In a medium bowl, melt the butter. Once melted, whisk in the granulated sugar, allowing the sweet crystals to dissolve seamlessly into the warm mixture.
Add the eggs one at a time, mixing vigorously after each addition until the mixture is glossy and well-combined.
Stir in the vanilla extract and red food coloring, watching as the vibrant hue transforms your mixture into a mesmerizing ruby red.
In another bowl, whisk together the flour, cocoa powder, baking powder, and salt, creating a dry blend that smells of rich chocolate.
Gradually add the dry ingredients to the wet mixture, folding gently until just combined. Don’t worry about overmixing; it’s meant to be a tiny bit lumpy.
Pour the luscious batter into the prepared pan, smoothing out to ensure even baking.
For the cream cheese swirl, beat the softened cream cheese with sugar using a hand mixer until creamy. Add the egg and vanilla extract, mixing just until combined—avoid overmixing.
Drop spoonfuls of the cream cheese mixture over the brownie batter, then use a knife to create beautiful swirls by drawing through the mixtures.
Bake in the preheated oven for 30-35 minutes, until a toothpick inserted into the center comes out with a few moist crumbs attached.
Allow your brownies to cool in the pan for about 10 minutes before transferring them to a wire rack to cool completely. This patience will greatly enhance the flavor and texture.
Serving Suggestions & Occasions
Red Velvet Brownies are truly versatile. They are perfect for a decadent dessert at a dinner party, bringing a touch of elegance and color to your spread. Serve them warm, perhaps topped with a scoop of vanilla ice cream and a drizzle of chocolate sauce for an indulgent treat. For casual gatherings, cut them into playful bite-sized squares, showcasing the beautiful cream cheese swirl that beckons to be eaten. These brownies can also serve as a delightful centerpiece for celebrations like Valentine’s Day or birthdays, adding a dash of color and sweetness to any occasion.
Common Mistakes For Red Velvet Brownies
One of the most frequent pitfalls when making Red Velvet Brownies is overbaking. Keep an eye on those last few minutes in the oven, as you want to achieve a fudgy interior. If the toothpick comes out completely clean, you may risk dryness. Additionally, underestimating the importance of softening your cream cheese can lead to a lumpy swirl, detracting from the overall aesthetic. Lastly, be mindful of the mixing; overmixing can make the brownies tough instead of the desired tender texture.
Healthier Alternatives & Variations
If you’re looking to make Red Velvet Brownies a bit healthier without sacrificing flavor, consider swapping granulated sugar with coconut sugar or using half the amount of sugar and relying on unsweetened applesauce for added moisture. Whole wheat flour can replace all-purpose flour, lending a nuttier flavor and extra fiber. For an alternate variation, try adding chocolate chips or chopped nuts for an added dimension of taste and texture. You can even get creative by adding a hint of peppermint extract for a festive twist.
FAQs
Can I make these brownies ahead of time?
Absolutely! These brownies can be baked in advance and stored in an airtight container for up to three days.How should I store leftovers?
Keep any leftover brownies in an airtight container at room temperature. You can also refrigerate them for a longer shelf life.Can I freeze Red Velvet Brownies?
Yes! Wrap individual brownies in plastic wrap, then place them in a freezer-safe container. They will last up to three months.Is there a substitute for red food coloring?
If you prefer a natural alternative, you can use beet juice or powdered beetroot, although the shade may be slightly different.Can I use a different type of cocoa powder?
Sure! Dutch-processed cocoa gives a richer flavor, while natural unsweetened cocoa yields a lighter, more acidic taste.How do I know when my brownies are done?
Check for moist crumbs on your toothpick; a few tender clumps means the brownies are perfect!
Conclusion
The moment you take your first bite of these luscious Red Velvet Brownies, you’ll understand why they are such a beloved treat. Their vivid hue, creamy swirl, and decadent texture weave together to create a delightful taste experience that beckons for seconds. So why not treat your taste buds today? Gather your ingredients, embrace the baking journey, and indulge in the warmth and happiness that comes from creating something truly special. Your cake-loving heart will thank you!
Red Velvet Brownies
Ingredients
Brownie Ingredients
- 1/2 cup unsalted butter, melted A luscious base for our brownies, infusing them with rich flavor.
- 1 cup granulated sugar This will sweeten the brownies to perfection, creating a delightful contrast to the cocoa.
- 2 large eggs Essential for binding the ingredients, adding moisture, and providing structure.
- 1 tsp vanilla extract The fragrant notes evoke warmth and sweetness in each bite.
- 1 tbsp red food coloring This vibrant hue gives our brownies their signature look.
- 1 cup all-purpose flour The backbone of our brownies, giving them the perfect tender crumb.
- 1/4 cup unsweetened cocoa powder Rich and bold, providing that familiar chocolate flavor.
- 1/2 tsp baking powder Essential for a little lift and fluffiness in texture.
- 1/4 tsp salt A pinch to enhance all the sweet flavors.
Cream Cheese Swirl Ingredients
- 8 oz cream cheese, softened This is our secret weapon for a creamy, dreamy swirl.
- 1/4 cup granulated sugar Sweetening the cream cheese mixture for a delightful contrast.
- 1 egg adds richness and stability to our creamy topping.
- 1/2 tsp vanilla extract Enhancing the flavors of the cream cheese for ultimate deliciousness.
Instructions
Preparation
- Preheat your oven to 350°F (175°C) and grease an 8×8-inch baking pan with parchment paper.
- Melt the butter in a medium bowl and whisk in the granulated sugar until dissolved.
- Add the eggs one at a time, mixing until glossy and well-combined.
- Stir in the vanilla extract and red food coloring.
- In another bowl, whisk together flour, cocoa powder, baking powder, and salt.
- Gradually add the dry ingredients to the wet mixture, folding gently until just combined.
Baking
- Pour the batter into the prepared pan and smooth it out.
- For the cream cheese swirl, beat the softened cream cheese with sugar until creamy, then add egg and vanilla, mixing just until combined.
- Drop spoonfuls of the cream cheese mixture over the brownie batter and swirl with a knife.
- Bake for 30-35 minutes until a toothpick comes out with a few moist crumbs.
- Let cool in the pan for 10 minutes before transferring to a wire rack.