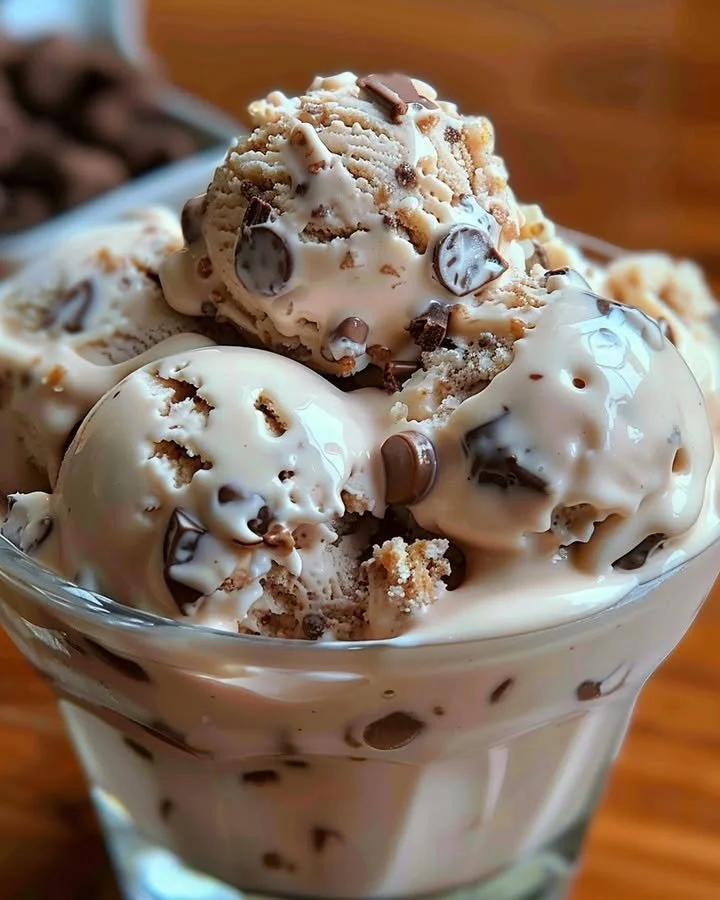
Rocky Road Ice Cream
Imagine a swirl of rich, creamy decadence that hugs your senses like a cozy blanket on a chilly evening. This Rocky Road Ice Cream recipe invites you into a world where chocolate meets a medley of delightful textures—crunchy nuts, soft marshmallows, and a luscious, velvety base that makes your taste buds dance. Join me on this step-by-step culinary adventure as we explore the magic behind homemade Rocky Road Ice Cream. It’s more than just a treat; it’s a celebration of life’s sweetest moments.
The origins of Rocky Road Ice Cream trace back to the Great Depression era, combining the best ingredients available at the time to create a comforting dessert. Popular lore suggests that this indulgent flavor emerged in the 1920s, originally created in California as a way to lift spirits during hard times. The name itself reflects a journey over rough terrain, making it an apt metaphor for overcoming life’s challenges with sweetness. Drawing from this rich history, we can appreciate the joy and nostalgia each spoonful brings, transforming any day into a celebration.
To create the ultimate Rocky Road Ice Cream, you’ll need the following ingredients: 2 cups of heavy cream, 1 cup of whole milk, 3/4 cup of granulated sugar, 1 teaspoon of vanilla extract, 1/2 cup of chocolate chips, 1/2 cup of mini marshmallows, and 1/2 cup of chopped nuts (choose between almonds, walnuts, or cashews). Each element plays a crucial role: the heavy cream brings a decadent richness, the milk adds a smooth texture, and the sugar imparts sweetness that balances the bittersweet chocolate. Your choice of nuts delivers a satisfying crunch, while the marshmallows introduce a tender, chewy contrast. As you gather these ingredients, imagine their aromas weaving a tapestry of warmth and comfort in your kitchen.
When it comes to making Rocky Road Ice Cream, the choice between quick and slow preparation can greatly affect your experience. For instance, using an ice cream maker speeds up the process, allowing you to enjoy a rich, homemade treat in about an hour, making it perfect for spontaneous gatherings. On the other hand, if you prefer the retro method of hand-churning, this intense, slow approach can foster anticipation and create engagement with the dessert-making process. Regardless of the method you choose, a few key tips for success include ensuring your ingredients are chilled thoroughly before mixing and churning until the ice cream reaches a soft-serve consistency, guaranteeing a smooth and creamy final product.
To embark on your Rocky Road Ice Cream journey, start by combining 2 cups of heavy cream, 1 cup of whole milk, 3/4 cup of granulated sugar, and 1 teaspoon of vanilla extract in a mixing bowl. As you whisk the mixture, revel in the transformation—the sugar dissolving into the creamy blend creates a perfect base for your sweet concoction. Once fully integrated, pour the mixture into your ice cream maker and churn according to the manufacturer’s instructions—typically for about 20 to 25 minutes. As the ingredients spin, a delightful anticipation builds, and the kitchen fills with the sweet scent of vanilla.
In the last five minutes of churning, it’s time to elevate your creation! Add in the 1/2 cup of chocolate chips, 1/2 cup of mini marshmallows, and 1/2 cup of chosen chopped nuts. Watch as these colorful morsels dance through the creamy base, infusing the ice cream with bursts of flavor and texture that elevate it from ordinary to extraordinary. Once your ice cream reaches a soft-serve consistency, scoop the mixture into an airtight container, sealing in the freshness and flavor. Place it in the freezer for at least four hours or until firm—resist the temptation to sneak a taste!
This homemade Rocky Road Ice Cream is perfect for serving on various occasions. Delight your friends and family at summer barbecues, birthday parties, or simply as a luxurious dessert for a cozy movie night at home. Pair it with a warm brownie or serve it in an elegant sundae glass topped with drizzles of chocolate syrup for an extra touch of indulgence. Alternatively, enjoy it as a guilt-free indulgence on your own, taking a moment to savor every spoonful amidst life’s bustle.
As you embark on your ice cream-making adventure, keep in mind some common mistakes. Avoid churning your ice cream for too long, as it may become icy instead of creamy. Ensure that your container is airtight to prevent freezer burn, and allow the ice cream to rest at room temperature for a few minutes before scooping to ensure ease. Lastly, remember to be generous with your chocolate chips, nuts, and marshmallows; after all, the magic of Rocky Road lies in its abundance!
For those looking to lighten their dessert table, there are countless healthy alternatives and delightful variations to explore. Substitute the heavy cream with coconut cream for a dairy-free option, or swap granulated sugar for a natural sweetener like honey or agave. For a twist on the traditional recipe, experiment with different mix-ins such as crushed cookies, dried fruits, or even a hint of spice like cinnamon for added warmth and richness to your creation.
Here are some frequently asked questions (FAQs) to help navigate your Rocky Road Ice Cream journey:
Can I make Rocky Road Ice Cream without an ice cream maker?
Yes, you can! Simply whisk the ingredients together, pour them into a freezer-safe dish, and stir every 30 minutes for about 3-4 hours until firm.How long does homemade Rocky Road Ice Cream last in the freezer?
When properly stored in an airtight container, it can last up to 2-3 weeks; however, for the best flavor and texture, try to enjoy it within a week.Can I use non-dairy milk in the recipe?
Absolutely! Almond milk or coconut milk can serve as great alternatives for a dairy-free version.What can I substitute for nuts if there are allergies?
Feel free to skip the nuts entirely or use seeds, like sunflower or pumpkin seeds, for a crunchy element without the allergens.How can I make this ice cream even more chocolatey?
Incorporate a tablespoon of cocoa powder or double the chocolate chips for a rich, chocolate lover’s version.Can I add fruit to my Rocky Road Ice Cream?
Yes! Fresh or freeze-dried fruit can add a burst of flavor. Just make sure to fold them in during the last minutes of churning.
Now that you’ve journeyed through the sensory experience of making Rocky Road Ice Cream, why wait any longer? Grab your ingredients and let the fun unfold! The rich flavors combined with the crunch and chew of the mix-ins will undoubtedly transport you to a world filled with comfort and joy. Savor every bite, and make this delightful ice cream recipe a staple in your home—because life is too short to skip dessert!

Rocky Road Ice Cream
Ingredients
Base ingredients
- 2 cups heavy cream Provides a rich creaminess.
- 1 cup whole milk Adds a smooth texture.
- 3/4 cup granulated sugar Balances the bitterness of chocolate.
- 1 teaspoon vanilla extract Enhances the overall flavor.
Mix-ins
- 1/2 cup chocolate chips For added chocolate flavor.
- 1/2 cup mini marshmallows Adds softness and chewiness.
- 1/2 cup chopped nuts Choose almonds, walnuts, or cashews.
Instructions
Preparation
- In a mixing bowl, combine 2 cups of heavy cream, 1 cup of whole milk, 3/4 cup of granulated sugar, and 1 teaspoon of vanilla extract. Whisk until the sugar is dissolved.
- Pour the mixture into your ice cream maker and churn according to the manufacturer's instructions for about 20 to 25 minutes.
Adding Mix-ins
- In the last five minutes of churning, add 1/2 cup of chocolate chips, 1/2 cup of mini marshmallows, and 1/2 cup of chopped nuts.
Freezing
- Once the ice cream reaches a soft-serve consistency, scoop the mixture into an airtight container and freeze for at least four hours or until firm.